
Having a website was an idea I had in a drawer for some time. It was when I joined Mainmatter that things started to happen. In the company, we have a thing called 20% time - 1 day of the week can be spent on open source work, community work (preparing conference talks, podcasts, etc.), or another project/activity that gets accepted to be done in this time.
Since it was my first job, I wanted to use this time to learn more, and I think there is not a better way for this than to start a project that you are interested in. So, I shared my will to create my website.
My biggest challenge was - How do I start?
I commented with a work colleague, Chris, that I was struggling and wanted some tips to start the project. He proposed to schedule a 45 min weekly pair programming session 🤩. It was the best deal I could ask for - an accountability buddy and a mentor. Also, it was nice to be able to collaborate with someone else from the company. Since Chris and I work for different clients, we never had the chance to work together.
In the rest of this post, I will share my journey of developing this website.
Choosing a JavaScript Framework
Chris is an Ember.js ninja 🥷 as well as the rest of the company, so it was an opportunity for me to learn Ember.
So, this is how the decision of what technology to use was done - Ember.js for the development 🐹 ✅
Designing
Before start coding, I needed a visual idea of what I wanted to build. I needed to enter in another learning path - UI/UX design. For this I chose Figma.
Collecting Inspiration
I started by collecting inspiration online with pinterest, dribble and check existing personal websites/blogs. This lead me to create a Notion page that I named 'Moodboard'.
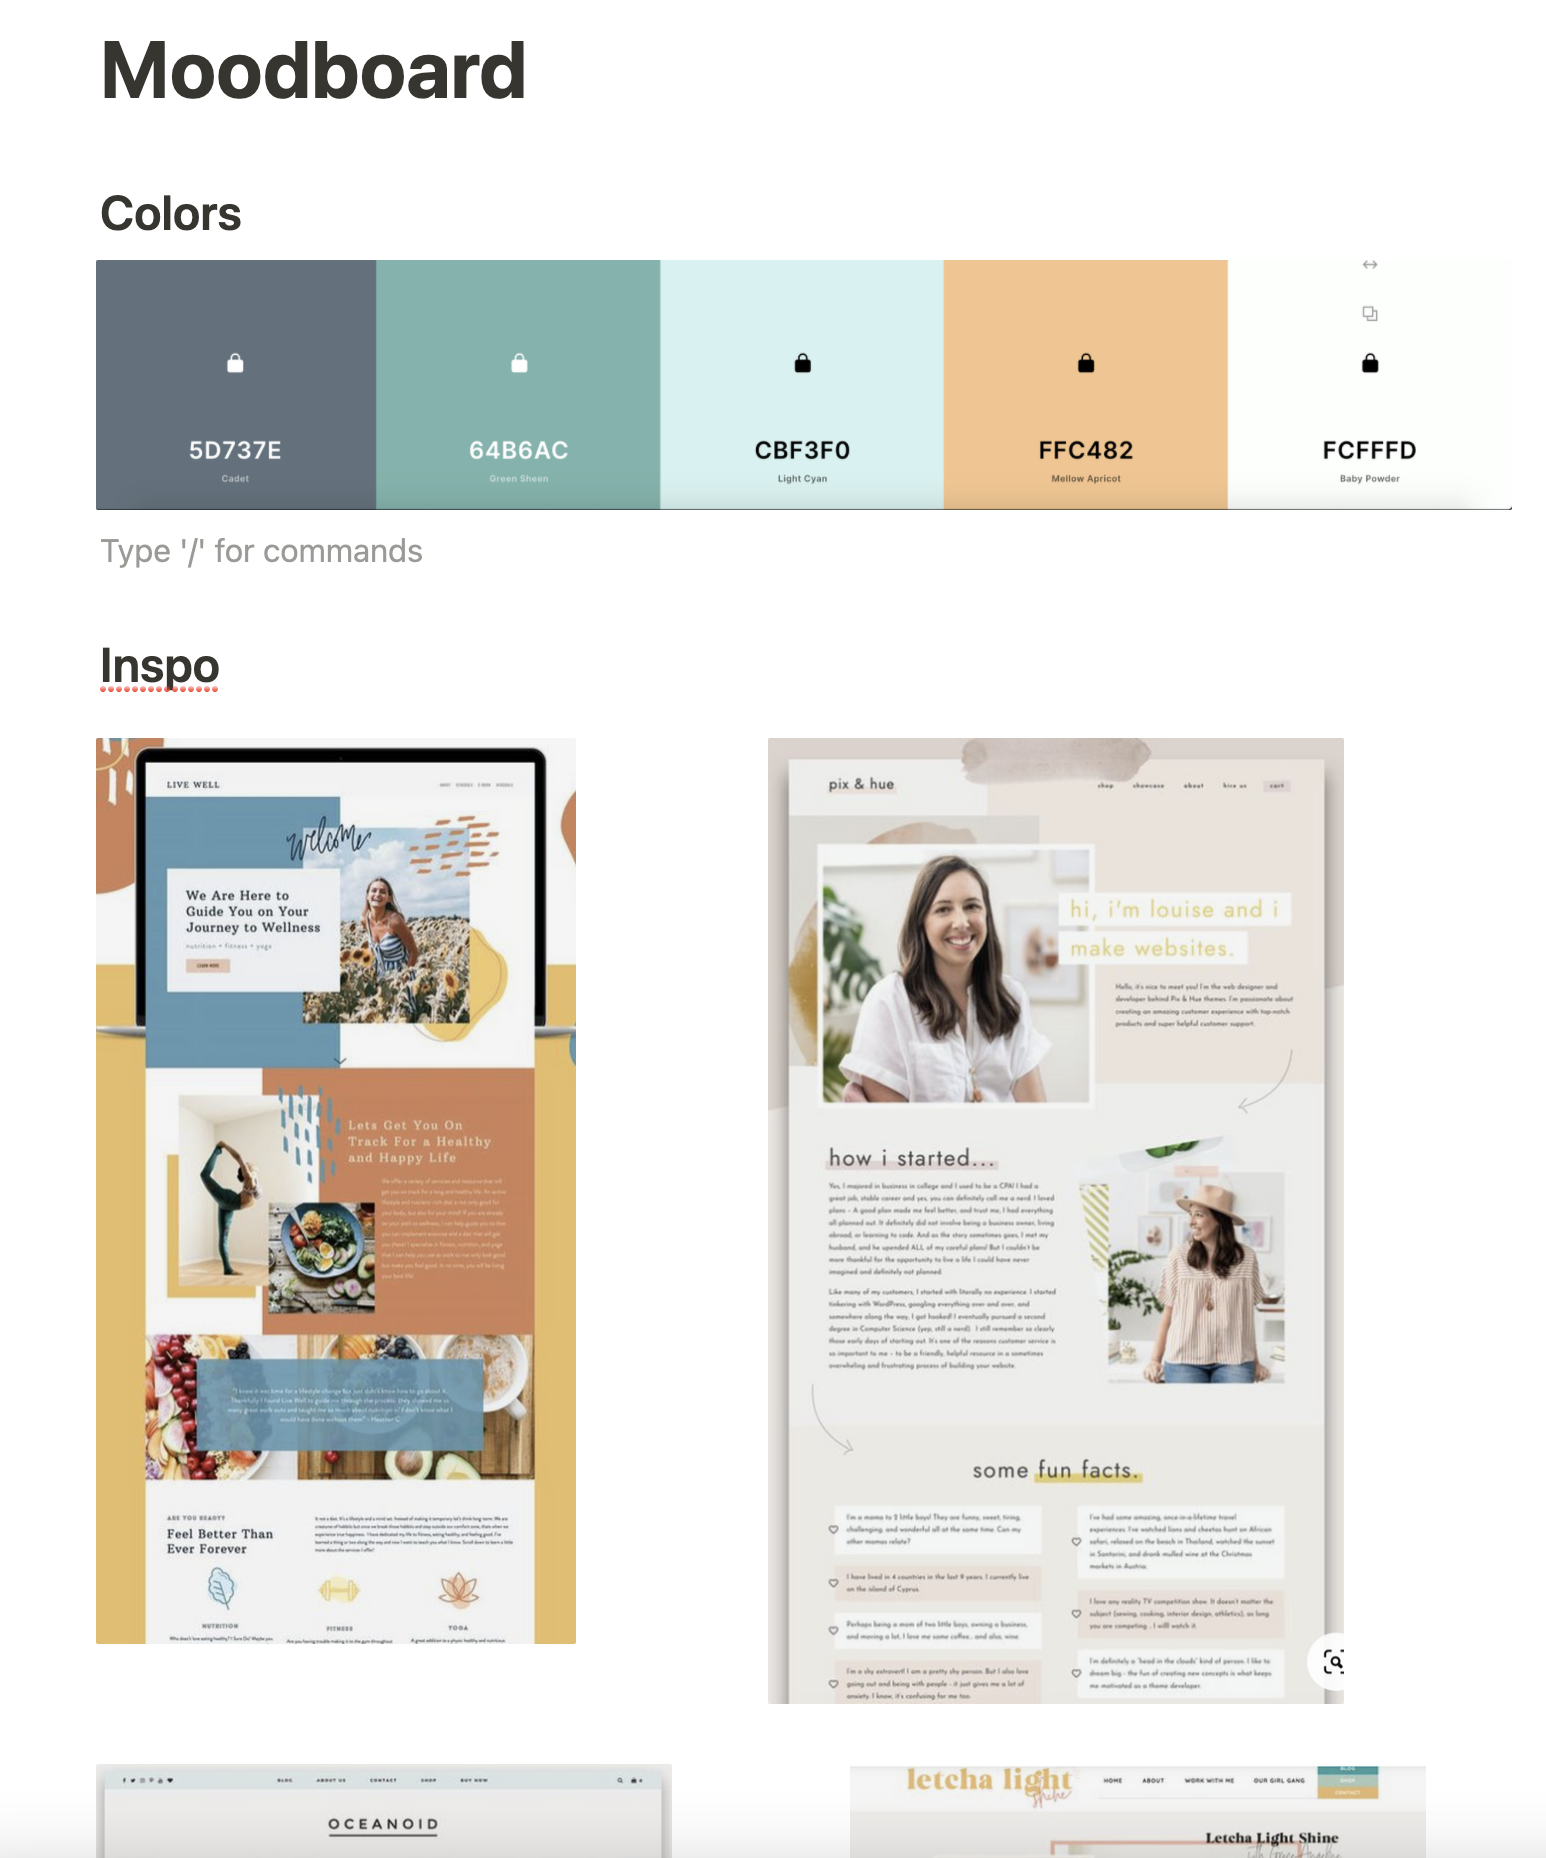
I also wanted to define colors I related to. I love blues and yellows, with this in mind I generated a starting point for a color palette.
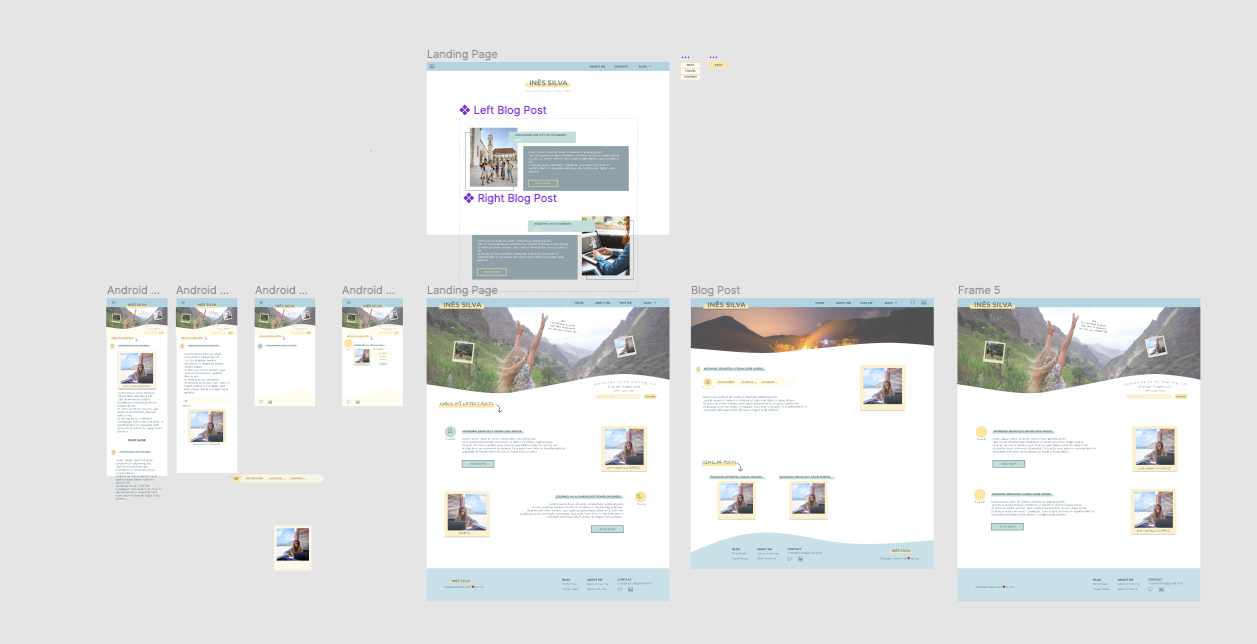
Start Sketching Screens
I chose Figma because I’ve worked with it before and felt it was intuitive enough to start using it fast.
I tried to learn how to create components there, but I think it required more experience in making design libraries, so I dropped it at some point. Also, it is probably more helpful for bigger projects.
I started with the landing page and then went from there. However, my first Figma file looked a bit over the place. 😂
At Mainmatter, some people are also 'design ninjas,' like Florian and Gabor. They recommended me some cool content to learn more about UI/UX - books and this book in particular.
Replacing Lorem Ipsum Placeholders for Real Data
My work colleague Florian suggested I clean up my Figma document and use actual content rather than the Lorem Ipsum placeholders.
By doing this, I understand better the space I need and how readable the text feels.
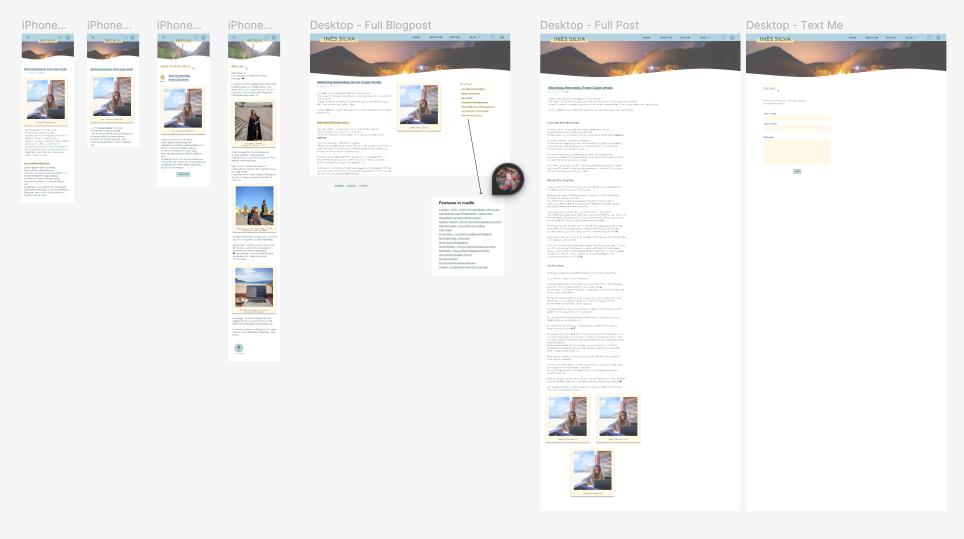
So, after tidying up and using the text I would like to show in my first blog post, this is how my Figma document looks like 🧹:
My Thoughts as a Web Dev doing Web Design for the First Time
As a web developer, I frequently work with designers, and I was excited to see things from their perspective. I believe that it makes us better front-end developers.
I realized the importance of a design document in a project. It works as a starting point for your development and makes you question development decisions sooner. It also gave me faster answers to questions like - what color do I use now? And what should be the font for this new heading I'm introducing?
At some point, I got impatient because I wanted to start seeing my design on my browser. To balance my impatience, I started coding when I had the main screens, and in parallel, I kept designing other elements and screens that, to me, had less priority - like the 'Text Me' page. I also think that designing can become a never-ending process, don't be so exigent and allow yourself to say 'Ok, I think it is good enough'.
Coding
Here I entered other learning paths:
- Git - I mean, at this point, I already accepted it is forever a learning experience 😂
- Ember.js 🐹
- Deploying websites
Connecting with GitHub
My first challenge was a Git one 😂.
I created my project locally, and I wanted to have it in GitHub as well. According to my notion notes, I achieved this by following the quick set up using the SSH option. The HTTPS is no longer supported - it gave me authentication errors.
So yeah, you can all see and judge my code on GitHub 😅
I also created a project on GitHub where I note down issues I needeed to fix and features I wanted to add.
Following Ember’s Quick Start Guide
To start the project, I followed the ember quick start guide).
I created:
- My first route - about-me
- My first component - header
- My first routes navigation - home ↔ about me
Starting with the CSS
I also decided to do all the CSS from scratch for learning purposes. I discover it is not the smoothest journey, especially when seeing that what works for one browser doesn’t work for another 🥲.
I also discovered that things that look easy in the design can be very time-consuming to build. An example is - the big fat underlines I use for titles, subtitles, and links.
Another challenge is that you always need to think about how things look on mobile. According to my website statistics, most people see it on mobile.
My First Coding Challenge
‘How to create a dropdown in ember?’.
Of course, I googled this. However, most of the blog posts presented old solutions, using things like {{action}}, which is no longer the way of doing it.
Chris helped me with this, and I think I will later do one post about it for those who might want to achieve the same thing and make it responsive (because that’s another CSS story 😅).
Rendering Blogposts
Another key point of my website was ‘How will I write my blog posts?’; ‘am I going to write on HTML every time?’ That looks like a lot of headaches. Chris proposed to create posts using markdown files, then he introduced me to the ember-cli-showdown add-on.
It is a component that will convert my markdown into a readable HTML object.
This way, I have a faster and more human approach for writing my posts, and the addon takes care of converting my post into something readable by the browser. It’s a deal 🤝.
Installing Broccoli-Static-Site-Json
After deciding to use markdown files for my blog posts, I needed to think about how to access the content of the markdown on my HTML templates.
Here is an example of my post-preview component template file:
Broccoli addon is what enables me to get the data from my markdown files, as we see in the code {{@post.category}}, {{@post.title}}, etc.
For this, we need a bit of a configuration before - we need to specify where is the data that we want to convert into a JSON:API document and what attributes we can access. I placed this configuration in the index file of the content-generator folder that is automatically created when you install Broccoli. Bellow we can see the configuration I added:
const postsTree = new StaticSiteJson('data/post', {
  type: 'post',
  contentFolder: 'data/posts',
  attributes: ['title', 'date', 'category', 'image', 'description'],
  collate: true,
});
There is a detail that I should point out - in front of contentFolder, I specify where in the directory my markdown files are, however if you see in my project the directory is actually 'data/post' and not /posts, however, Chris told me it needed to be in plural. (Don't ask me why 😅).
Now to glue the attributes my JSON API is expecting to their values, I specified them in the beginning of the markdown file in YAML:
---
title: How I Built This Website
category: tech
description: " I’m so happy to see a project of my own being out there.
Today, I wanted to look back and see how this started and how it went.
It has been a long ride that is still going on - right now, I’m starting to focus on improving the performance of my website (a topic for a later post 😉).
I learned a lot about design, UI sketching tools, like Figma, and a new JS framework for me - Ember.
I deployed a website for the first time 🙌 and I got to fix the challenges that may come with it.
Perhaps this can be useful for someone that is also interested in start creating their own corner in the internet."
image: "foggy-work-day.jpg"
date: 2022-11-24T00:00:00.000Z
---
Thanks to Broccolli I get my static markdown files into static JSON:API.
Deploying
Ok, we reach the last pokemon level here.
When I told myself, ‘Ok, I have all the main functionalities I wanted, and it looks quite close to my designs,’ it is time to put it out there 🕺💃
I bought a domain in namecheap and I deployed my website using netlify.
What were the challenges I faced in this phase?
- Saying ‘It is ready to become public’ 😂.
The website was not exactly how I first idealized it.
However, I needed to accept that not everything needs to be done for the website to be used. Chris helped me focus and forced me to put on my Product Manager hat by telling me to note down what were the minimal features to make my website a functional project.
- Image fingerprinting.
The photos were not loading on my deployed website.
Why? The browser was adding a hash to my photo sources. On my HTML for the photo source, I would have something like ‘work-in-cv.jpg’ and the browser was adding a hash and transforming the source into something like this ‘work-in-cv-h4323524hgs.jpg’. There was no agreement on what to show anymore, and the latter path didn't exist on my app.
I fixed this problem by specifying in the ember-cli-build what type of files I wanted to get fingerprinted:
module.exports = function (defaults) {
  let app = new EmberApp(defaults, {
    // Add options here
    fingerprint: {
      extensions: ['js', 'css', 'map'],
    },
  }
}
- Routes were not found.
Ember is a SPA (Single Page Application). Therefore, it just recognizes the index page and only knows how to navigate from there. If I wrote a URL to a specific post on my browser, it wouldn't recognize it. I created HTML files for my routes, so my browser knew what to render. Let me explain more:
Chris told me there were 2 ways to fix this:
Creating HTML files in the paths of the routes.
If we want to keep this a SPA - we tell Netlify to give us the index.html when we get a 404 error and ember decides what page we are going to render.
Which way is better?
In most cases, it doesn’t matter, but for content sites, we want SEO, Search Engine Optimization, and what gives us this is opting for the first way to fix this issue.
For this, I installed another addon, Prember.
Installing Prember
As I explained before, to fix my ‘Routes not found’ problem after the deployment, I installed Prember.
After, I needed to inform my app of which URLS I wanted to get converted into HTML files.
The most challenging was, how to pass the url of the different posts since they keep changing?
All of this needed to be defined in my ember-cli-build.js file.
To address the problem of the dynamic URL creation for the posts URLs, I created a little function.
Let’s go through what I added in my ember-cli file for this:
const fs = require('fs');
let posts = fs.readdirSync('data/post').map((file) => {
  return `posts/${file.replace(/\.md$/, '')}`;
});

module.exports = function (defaults) {
  let app = new EmberApp(defaults, {
    prember: {
      urls: ['/', '/about-me', '/contact', '/posts', ...posts],
    },
  });
  return app.toTree();
};
With the
readdirSync()I can read all the file names inside of‘data/post’directory.With
.mapI go through each of the file name, and in each I create the URL I need - it always have/postsbefore and it shouldn’t have the.mdextension.To remove
.md, I use a regex expression -/\.md$/and the methodreplace(). Putting all together likereplace(/\.md$/, '')my code knows not to consider the.mdin my file's names.Finally, I add
...poststo the array of URLs, the...will deconstruct the posts array and merge its values in theurls array, like so:urls: ['/', '/about-me', '/contact', '/posts', '/posts/working-remotely-from-cape-verde'].
C'est Fini?
I'm currently working on improving the performance of my website. After running Lighthouse, I figured out that at least the images needed to be compressed. 😅
I would love to still add some functionalities, for example, enabling users to comment on my posts.
The 'Text Me' page was also something I added after (I might do a post later about how I did it). By the way, you can use it to question me something about this post. 😉
I didn't achieve some design details yet, like displaying my Image header with a curvy layout at the bottom.
So yeah let's see what comes next. 😄